|
| Tutorial: Sparkle
|

Here's a simple little
sparkle anyone can make with PSP6 to give their graphics some life.
|
STEP ONE
|
|
Lets start with our 'canvas'.
I'm using black as my background color to work with (obviously) but use
what you feel like at the moment - but white wouldnt be too good for
highlights tho would it? :).
|
STEP TWO
|
|
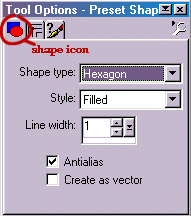
Now select the 'Preset Shapes'
tool, located at the bottom left of the program window (on the 'tool
pallette). If the tool palette isn't showing, click on the small 'spanner'
( ) at the top of the screen, or choose [View]>[Toolbars], then
make sure 'Tool Palette' is checked. ) at the top of the screen, or choose [View]>[Toolbars], then
make sure 'Tool Palette' is checked.
Choose Hexagon from the 'shape
type' dropdown menu, Filled from the 'style' menu and a line width of 1. I
find for best results, choose 'antialias' (gives a feathered
touch).
|
STEP THREE
|
|
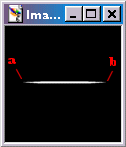
With a foreground color of
white (or any other pale color of your choice), left-click and drag from
point 'a' to point 'b' (aprox :) ).
|
STEP FOUR
|
|
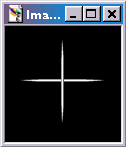
Select the 'magic wand' ( ) from the tool palette and left-click anywhere on the 'canvas',
excluding the white line. Then [selections]>[Invert], and you should
now have the white line selected (white lines moving constantly around the
line you created). Now follow these points (I will use shortcut keys here,
you can always substitute them for an option on the menu
bar) ) from the tool palette and left-click anywhere on the 'canvas',
excluding the white line. Then [selections]>[Invert], and you should
now have the white line selected (white lines moving constantly around the
line you created). Now follow these points (I will use shortcut keys here,
you can always substitute them for an option on the menu
bar)
[CTRL]+[C] to copy to the clipboard.
[CTRL]+[E] to paste to
the image.
[CTRL]+[R] to rotate - choose 90degrees.
Place cursor
over the line, a red 'crosshair' should appear.
Now click and hold on
the line and place apropriately.
Select
[Selections]>[defloat]
|
STEP FIVE
|
|
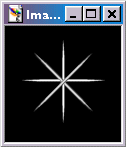
Now simply put two more lines
on the image. Use the [CTRL]+[E] to paste (the line is still in the
clipboard as your last copied item), then [CTRL]+[R] to rotate (use
45degrees this time).
|
STEP SIX
|
|
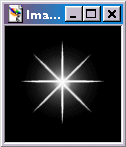
Next I selected the
'paintbrush tool' with properties of size:80, Hardness:20 and Opacity:20.
I put a single click of white onto the image. Next do a couple more clicks
of color with smaller varying sizes (I used 55, 35, 25 and 10 (coupla more
clicks on 10).
And there we are, a spiffy looking sparkle, made
by you without the use of a tube.
|
Try varying your highlights with the brush.
And try
different sized diagonal lines, just make them smaller.
You can make your
own tube for a sparkle by following these steps above
just put it all on a
layer above a black background, when the top layer (with the sparkle)
is
active, [ctrl]+[c] to copy, [ctrl]+[v] paste as new image, then
[File]>[Export]>[Picture Tube].
Hope you enjoyed your first
sparkle!

|
|
|


