STEP ONE
|
|
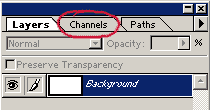
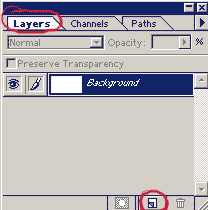
With your new 'canvas' ready, click on the 'channels' tab - shown left. If the channels tab is not shown, select
Window > Show Channels.
|
STEP TWO
|
 Click on the 'new layer' icon ( Click on the 'new layer' icon ( ) to create a
new channel layer, name it what you like (textone for example). Now press 'T' on your keyboard or select the text tool on your toolbar. On the new channel layer,
left click and enter the required info into the text option box (choose a nice fat font). ) to create a
new channel layer, name it what you like (textone for example). Now press 'T' on your keyboard or select the text tool on your toolbar. On the new channel layer,
left click and enter the required info into the text option box (choose a nice fat font).
When your happy with your font options, click ok and press 'V' or choose the move tool from your toolbar and move the text to the
required position.
|
STEP THREE
|
|
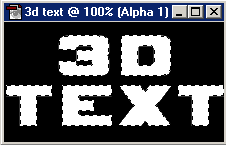
Now click and hold on the channel layer that you were just working on (textone). Drag it down to the new layer icon () and release to create a duplicate channel.
You should now have two channels looking similar to the image on the left. By the way - Leave the selection active!
Now on the second channel (the one you just copied), use Filter > Blur > Gaussian Blur. I used the filter four times with the radius - 6, 4, 2 then 1, just play around till your happy. (remember the selection must still be active during this).
Now choose Select > Inverse to reverse the selection, press Backspace on your keyboard and then Ctrl + D or Select > Deselect to kill the selection.
This cleans any rough edges off the edge of the letters.
|
STEP FOUR
|
|
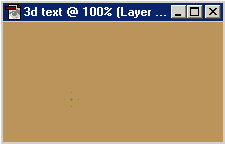
Click the 'layer' tab to go back to your image layers, and click the background layer. Click on the new layer icon below, to create a new layer above the background.
Now fill the layer with a nice color of your choice - Pick one off the swatches pallete or click on the foreground color and select a color from the popup, then just press ALT + BACKSPACE to fill the entire layer.
|
STEP FIVE
|
|
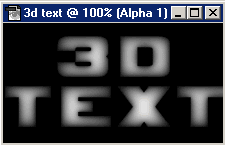
With the colored layer selected, choose Filter > Render > Lighting Effects which brings up the option menu. I used most of the default settings for this one,
just make sure the 'Texture Channel' down the bottom of the menu is set to the channel that you created the blurred text on (mine was Alpha 1). I also set the height to mountainous. Play with all these settings
as this is a good filter to get used to. You should end up with an image similar to the one on the left.
|
STEP SIX
|
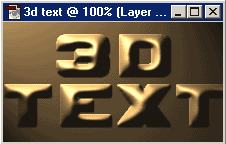
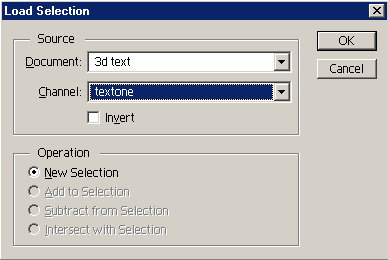 Now with the same layer selected still, choose Select > Load Selection to bring up the option box on the left. We want the selection from the original text channel that we created, mine was 'textone'.
Click 'ok' when done and the selection should now be active. Choose Select > Inverse and then press delete on your keyboard. Now with the same layer selected still, choose Select > Load Selection to bring up the option box on the left. We want the selection from the original text channel that we created, mine was 'textone'.
Click 'ok' when done and the selection should now be active. Choose Select > Inverse and then press delete on your keyboard.
The image below left should now be how it looks.

|
STEP SEVEN
|

|
That's it, just change the background color or add any other effects that you wish to include.
Have fun.
|